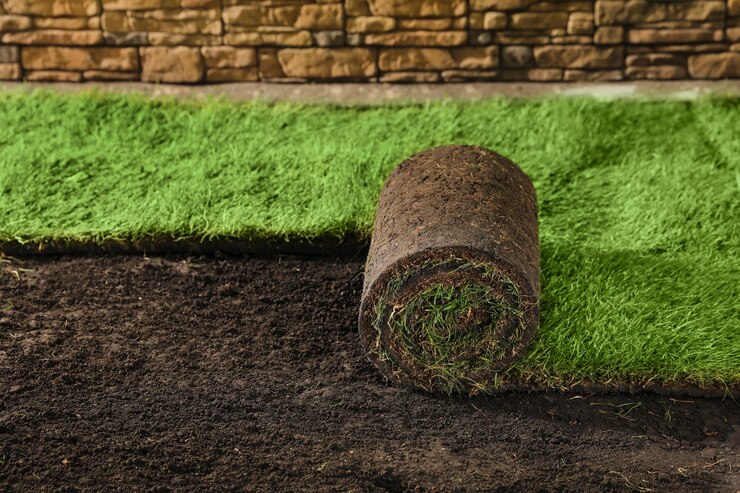
If your backyard currently resembles a forgotten construction site or a parched canvas of patchy soil, laying turf offers a strikingly simple and immediate transformation. The process isn’t nearly as difficult as it might seem, regardless of your vision—a soft patch of real grass or a spotlessly green expanse of artificial turf. In actuality, it’s incredibly effective—and incredibly fulfilling—when prepared properly.
Artificial turf has emerged as the preferred option for homeowners looking for a low-maintenance, visually appealing lawn in recent years. The advantages are remarkably broad, ranging from retirees hoping to lower water bills and mower noise to parents desiring cleaner play areas. And since modern turf technology can now replicate natural grass with astonishing accuracy, the choice now comes down to how soon you’re ready to start rather than whether it’s more practical or beautiful.
Turf Installation Essentials – Quick-Reference Table
| Project Type | Backyard Turf Installation (Artificial or Natural) |
|---|---|
| Best Season | Spring or early autumn |
| Base Preparation Depth | Approx. 2.5 inches |
| Tools Needed | Shovel, rake, tamper, utility knife, brush |
| Materials Required | Turf rolls, weed barrier, aggregate, adhesive, infill |
| Install Time | 1–2 days (depending on yard size and prep) |
| Estimated Lifespan | Up to 20 years (with care for artificial turf) |
| Reference | Turfgrass Producers International |
Step 1: Accurately Setting Up the Foundation
Excellent groundwork is the foundation of great turf. To make room for a compacted sub-base, start by removing all debris, including mulch, rocks, roots, and grass clippings. Then, dig down about 2.5 inches. This entails raking the soil level and loosening it for real turf. You must first apply a weed barrier and then a crushed aggregate base for synthetic turf. Use a rake to level the surface, and then a tamper to compact it. Imagine it as laying the groundwork for an everlasting green carpet.
Step 2: Intentionally Rolling Out and Trimming
Your turf should be unrolled in neat, straight lines. Start at one end and gently place each roll, ensuring the grass fibers point in the same direction for a seamless appearance. Using a sharp utility knife, carefully cut the edges around flower beds or curves. Turfs that overlap slightly and are precisely trimmed can produce a polished finish that is visually identical to real sod in irregularly shaped areas.
The method slightly changes when working with curves. Start by laying turf along the straight and curved edges of your borders and securing them with nails. After that, trim the turf to match the arcs and bends, much like a tailor would when fitting a jacket. These custom cuts can be especially useful for softening the yard’s visual flow and breaking up boxy lines.
Step 3: Sealing Off Edges and Improving Seams
You can maintain the stability and smoothness of your lawn by using adhesive along seam tape and securing the turf perimeter with staples or nails. Overlapping the rolls slightly during seam placement, then pressing down firmly, minimizes visible lines. This is a crucial step for artificial turf. The goal is to create a final appearance that feels remarkably realistic, not just to keep the grass in place.
After the turf is set, evenly distribute the infill and give the area a thorough brushing with a broom that has stiff bristles. This cross-brushing motion gives your lawn its soft, springy texture and keeps the fibers upright. Additionally, it adds weight and aids in temperature regulation, keeping the turf anchored during changes in the weather.
Step 4: Visual Longevity and Continuous Maintenance
Even if artificial turf doesn’t grow, it still needs to be maintained. High-traffic areas should be routinely brushed to avoid matting. Rinse off the dirt and, if you have a pet, use warm water and a sprinkle of baking soda to eliminate odors. For organic stains or sticky spills, combine a mild detergent with warm water, gently dab, and then rinse. You can maintain the surface’s cleanliness and the color’s vibrancy all year long by keeping up with maintenance.
The early stages are critical for natural turf. For the first ten days, especially during dry spells, water liberally. Until the roots are completely established, which usually takes about two weeks, don’t walk on it. You can start light mowing and treat your lawn like the living, breathing backyard feature that it is once it has taken root.
Innovative Use Cases: Not Just for the Lawn
Turf is extremely versatile and isn’t just for show. Golf enthusiasts can improve their short game without ever scheduling a tee time by installing a putting green in their backyard. Turf provides a hygienic, cushioned surface for children’s play areas that is safer than soil and simpler to maintain. You can even lay turf walkways between garden beds or turn unused patio nooks into places for meditation. Turf becomes more about lifestyle design and less about ground cover in each of these situations.

